Debian on a QNAP TS-464 NAS

For the past four years I had been running a Probox HD7-SU31C USB-C direct attached storage (DAS) enclosure connected to a NUC10 as a NAS solution. This JBOD only enclosure supported 10GBps and UASP and worked very well.

Hotway HD7-SU31C DAS connected to an Intel NUC10 (BXNUC10I7FNH4)

But it wasn’t perfect, as a I found out after a power outage and after dealing with a failing disk. The two main issues that this setup had were:

  1. The DAS would not automatically power on after a power outage. It required the power button to be manually pressed. This then created issues with starting other VMs on the NUC, even if they did not require access to the DAS.
  2. While trying do diagnosis and fix disk issues it would often need a reboot would which meant all the other VMs also being rebooted and/or offline while attempt to resolve this issues.

The solution was a move to a new NAS that run totally independent of the main NUC server. Ideally power consumption would be low and the size would be small (and preferably still fit in the existing 12U rack). It quickly becomes apparently that satisfying these requirements would be a lot easier by buying a pre-built NAS rather than trying to build one. But could you ditch the NAS OS and run you own and could you increase the included memory? Since most of these run their own OS, which I wasn’t interested in using, and tend to have a minimal amount of RAM.

The QNAP TS-464

The QNAP TS-464 looked to be an ideal candidate. The main features were:

  • 4 x 3.5″ SATA HDD
  • 2 x M.2 2280 NVMe (PCIe Gen3 x1)
  • 2 x 2.5G Ethernet
  • 1 x PCIe slot (PCIe Gen3 x2)
  • 2 x USB3.2 Gen2 (10Gbps)
  • 2 x USB2.0 Gen1
  • 1 x HDMI (4k@60hz)
  • 2 x DDR4 SO-DIMM (I found reports of 64G of RAM being used successfully)
  • Intel N5105 CPU: 4-core/4-thread, 2.0Ghz-2.5Ghz, 10W TDP

The main two questions that remained were:

  • Can you run your own OS?
  • Can you replace the RAM and how much can you install?

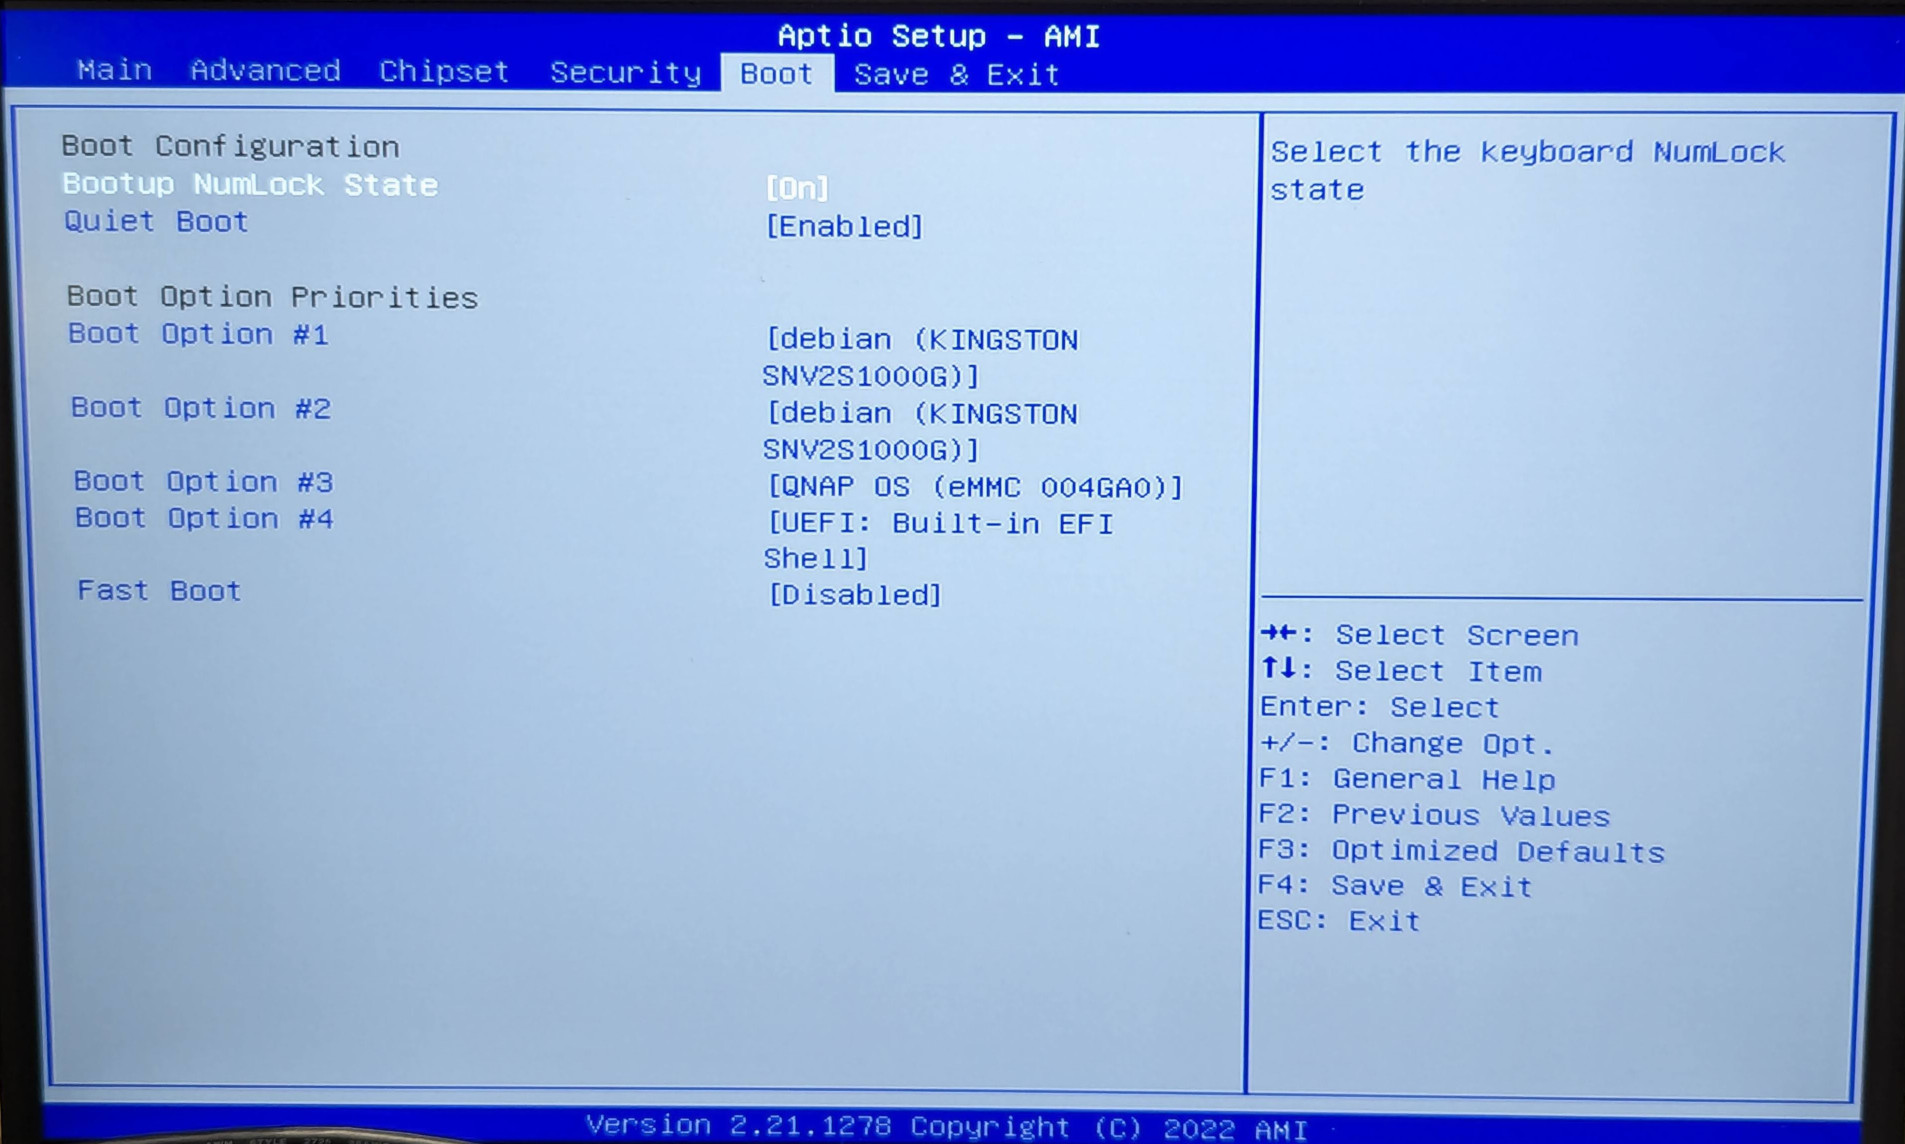
Research suggested that it was possible to run your own OS. It turned out to be trivial to do so. This system has a standard AMI bios with the normal boot preferences options you would expect. So it was simple to boot Debian from USB, install to the SSD and then change the main boot device to the SSD.

There were some reports that the RAM was solder down but that seemed to be isolated to a few reports, with plenty of people reporting successfully upgrading the RAM. The QNAP TS-464 8G that arrived here from amazon had 2 x DDR4 SO-DIMM slots with a single 8G SO-DIMM fitted (A Transcend TS1GSH64V6B 8GB DDR4 2666 SO-DIMM 1Rx8 1.2V).

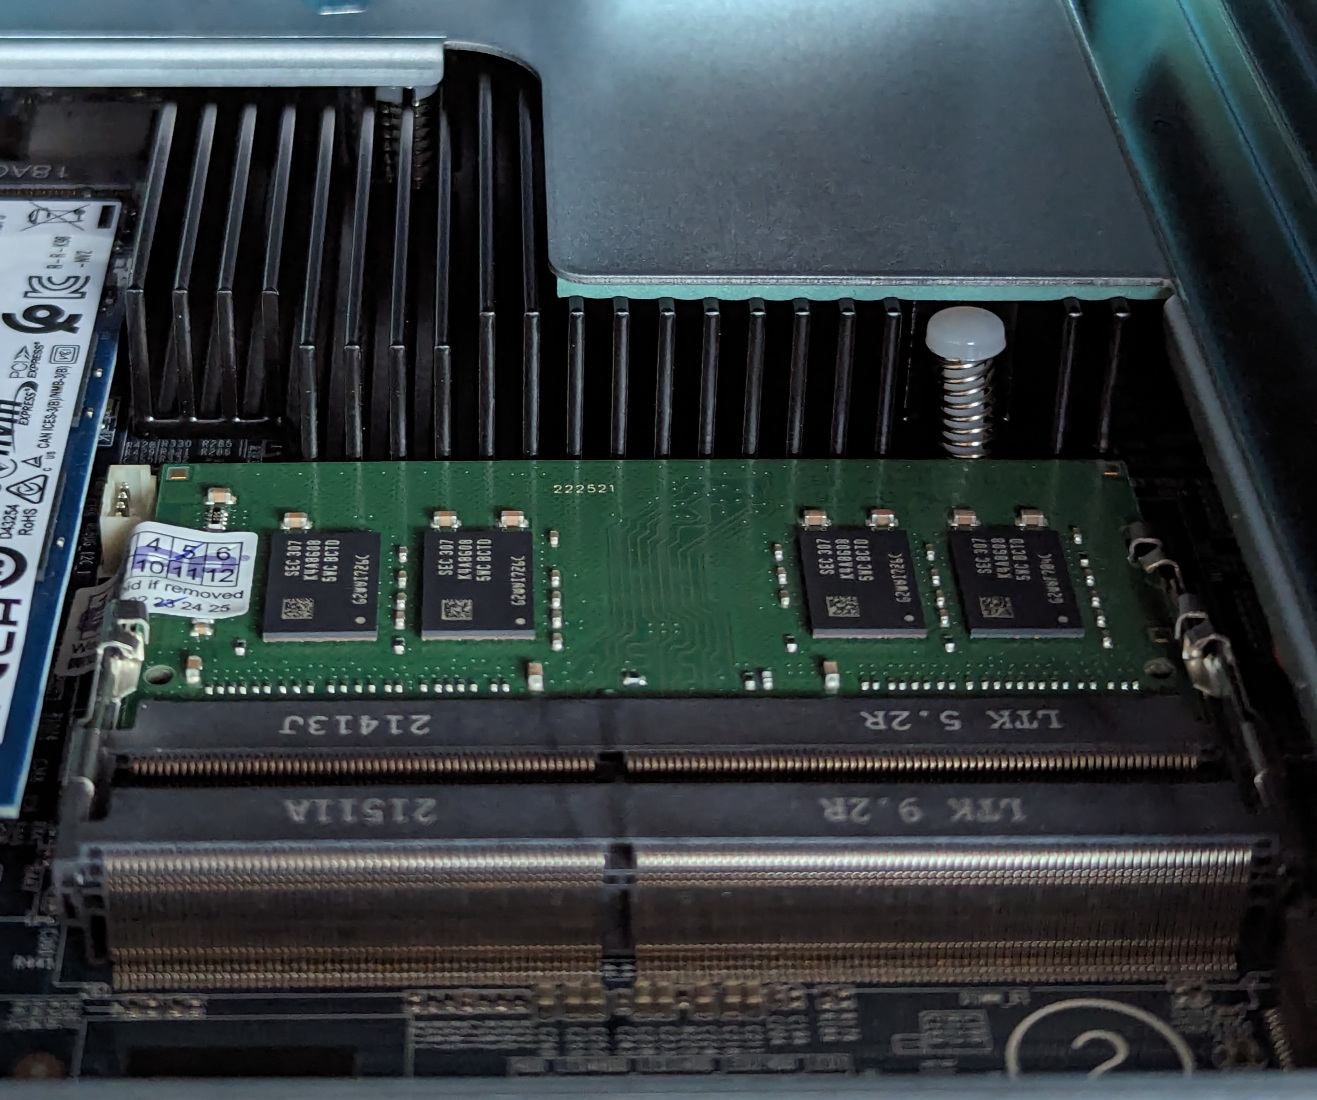
Replacing these was as easy as you would expected.

The final build

To the original QNAP TS-464 I added or change the following items:

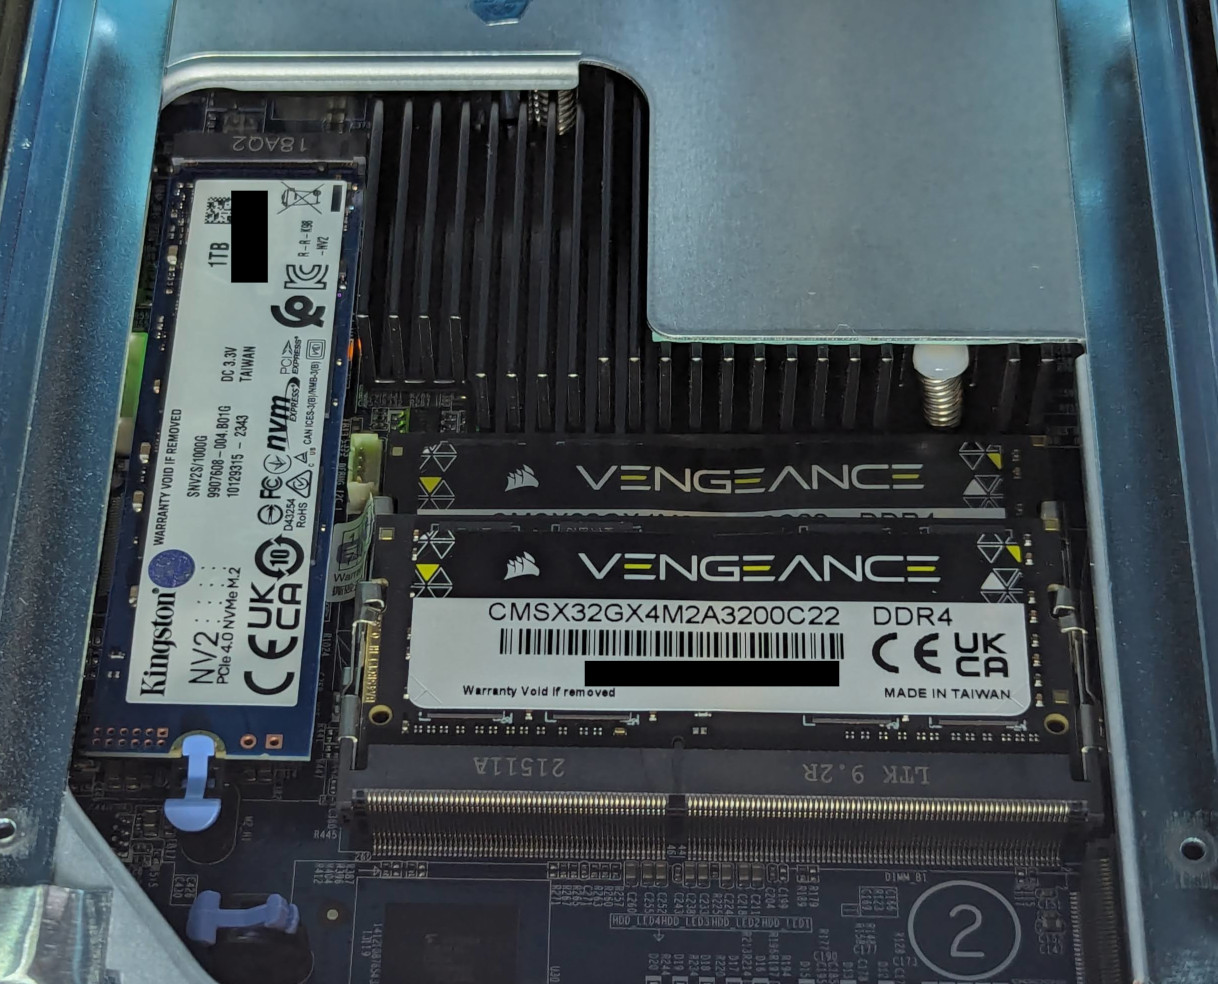
  • 2 x 16G DDD4 SO-DIMMs: Corsair Vengeance SODIMM 32GB (2x16GB) DDR4 3200MHz C22 Memory (CMSX32GX4M2A3200C22).
  • 1 x 1TB NVMe SSD: Kingston NV2 M.2 PCIe 4.0 NVMe 1TB, Solid State Drive (SNV2S1000G)
  • 2 x 12T 3.5″ HDDs: Seagate IronWolf Pro 12TB 7200RPM ST12000NT001
  • 2 x older HDDs
The added SO-DIMM’s and NVMe SSD

The memory is more than I need but I always find older gear eventually gets retired for a lack of memory more than anything else, so more is better for longevity. The SSD is only a boot drive, and only connected to a PCIe Gen3 x1 lane, so I went cheap on on the SSD.

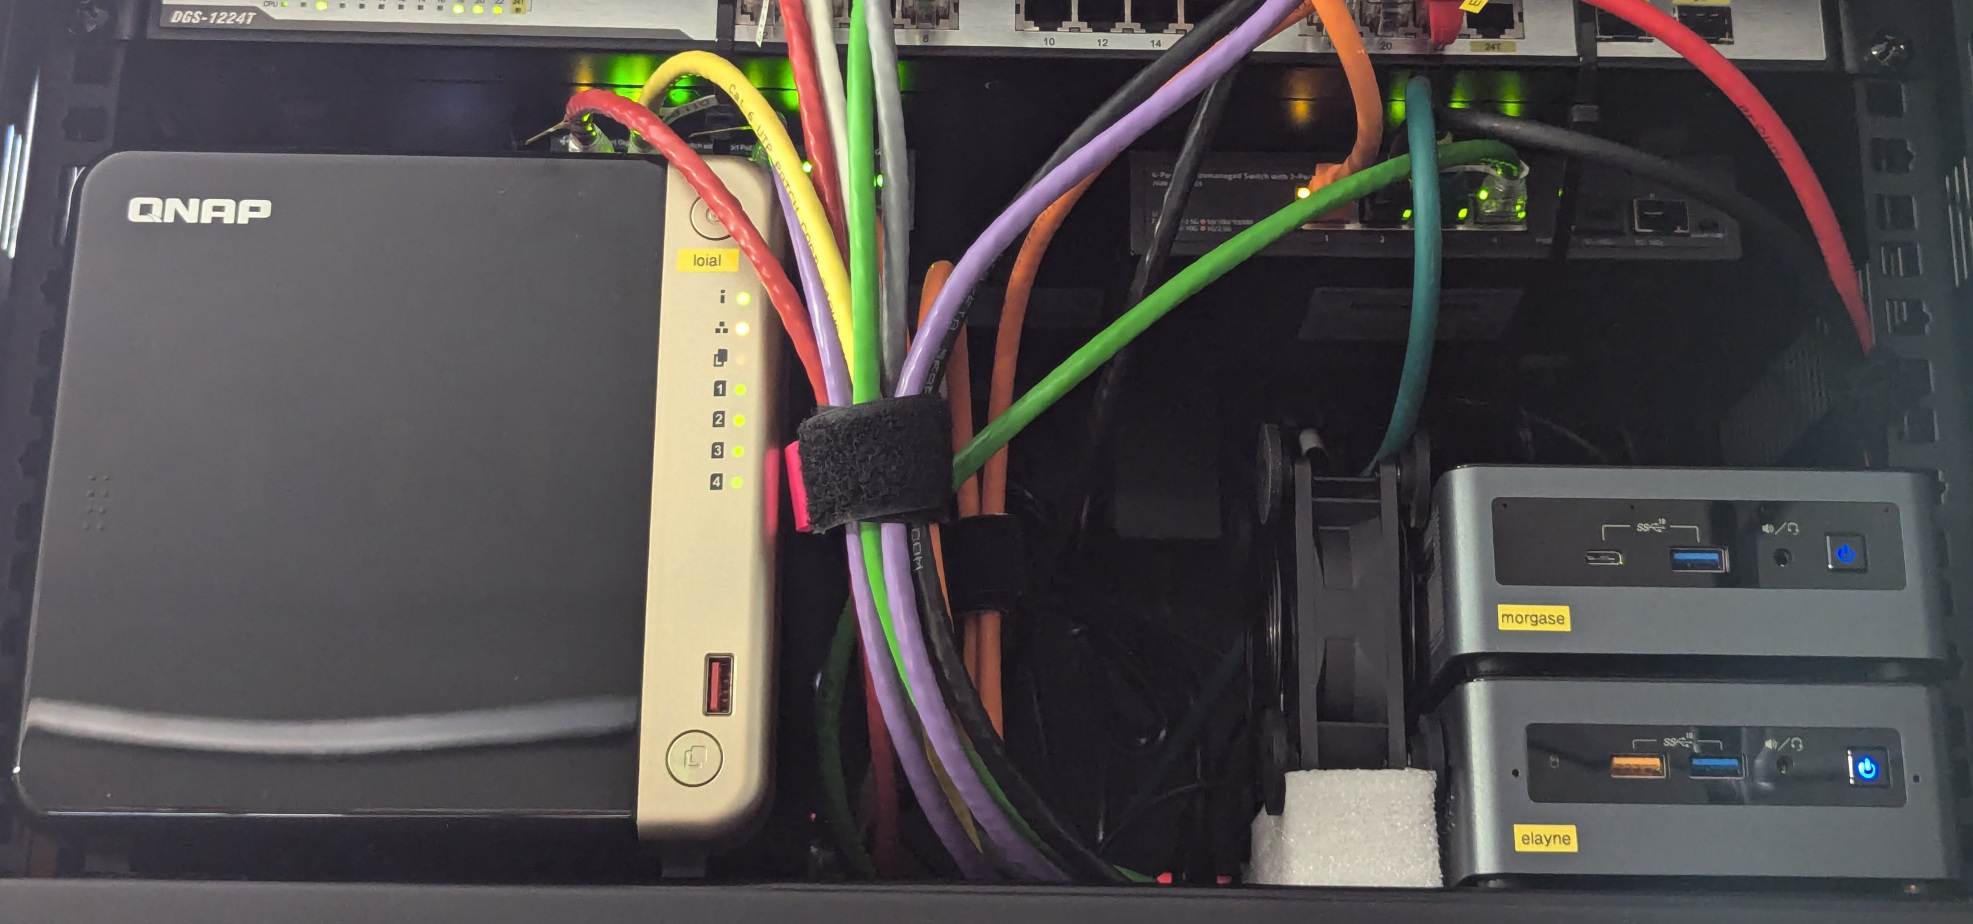
The QNAP is now in the rack replacing the old DAS with all NFS, SMB and iSCSI services moved to the NAS.

QNAP-T464 NAS and the NUC10 (BXNUC10I7FNH4) and NUC7 (BOXNUC7CJYH4) servers

Apart from NAS duties I also run frigate (NVR) container and home assistant VM on the QNAP.

Since the original build the I have swapped out the older HDDs for 2 x 16T Seagate Ironwolf Pro’s, connected a Google Edge USB TPU (for the frigate NVR container) and connected a SkyConnect Zigbee/thread USB device (for home assistant VM).

The Edge TPU was probably not needed as it turns out that openvino using the Intel GPU in the N5105 CPU would have been fine for the number of cameras I have (The inference time was =~ 12ms for openvino vs 8.09ms for the USB Edge TPU.)

Pioneer SC-LX57, Linux, MythTv, Intel (i915) GPU and HDMI issues

The HTPC

Notes on my long running project to build a HTPC to replace my aging PVR has had many issues. The HDMI output is from the GPU on an Intel i3-3220 CPU in a Gigabyte GA-Z68M-D2H motherboard which is then connected to a Pioneer SC-LX57 AVR and then onto a Panasonic TH50PZ700A 50″ plasma screen.

No sound at 1080p resolution

Initially I was using a Yamaha RXV-3800 AVR and sound was working fine. After returning from holidays and finding the Yamaha had failed. Eventually the failed AVR was replaced with a Pioneer SC-LX57 AVR. At this point I no longer had any HDMI audio and since the HTPC was still a work in progress I could no longer remember if it used to work or not. I thought I had, but wasn’t sure.

After much messing around it wasn’t until the output reverted itself to 720p (due to the second issue below) that I suddenly heard sound from the HTPC via the new Pioneer AVR. It still took some time to figure out that  there was no sound at 1080p@60 and 1080p@50 but with any other resolution sound worked fine. So 1080i and 720p both worked fine for example.

The issue turned out to be a timing issue in the Intel driver. Apparently most amplifiers were fine with the wrong timings, but the Pioneer was not happy and refused to decode the audio. The first reference to this issue I could find, along with some clues as to what was going on, was on the alsa-users mailing list:

https://www.mail-archive.com/alsa-user@lists.sourceforge.net/msg29210.html

The eventual fix appeared several months later on the intel-gfx list:

http://www.mail-archive.com/intel-gfx@lists.freedesktop.org/msg27874.html

The fix was eventually merged into the main line kernel version 3.13-rc1:

commit 1a91510dc3b8098930ebda3018f5cd72e8428243
Author: Jani Nikula <jani.nikula@intel.com>
Date:   Wed Oct 16 12:34:48 2013 +0300

    drm/i915: set HDMI pixel clock in audio configuration

    The HDMI audio expects HDMI pixel clock to be set in the audio
    configuration. We've currently just set 0, using 25.2 / 1.001 kHz
    frequency, which fails with some modes.

    v2: Now with a commit message.

After upgrading the kernel to 3.13-rc3 sound was indeed working again at 1080p, and all other resolutions.

Default resolution of 720p

Every time the HTPC was turned on, or a different input device was selected on the AVR and then the HTPC device re-selected the resolution would switch back to 720p. Needless to say this was rather annoying.

There were two different issues at play here. The first was that the display was reporting that it prefered 720p in its EDID information:

[htpc][ 7:01PM]~#> DISPLAY=:0 xrandr --current
Screen 0: minimum 320 x 200, current 1920 x 1080, maximum 32767 x 32767
VGA1 disconnected (normal left inverted right x axis y axis)
HDMI1 disconnected (normal left inverted right x axis y axis)
DP1 disconnected (normal left inverted right x axis y axis)
HDMI2 connected 1920x1080+0+0 (normal left inverted right x axis y axis) 1434mm x 806mm
   1280x720       50.0 +   60.0  
   1920x1080      60.0*    50.0  
   1920x1080i     30.0     25.0  
   1440x576i      25.0  
   1440x480i      30.0  
   720x576        50.0  
   720x480        59.9  
   640x480        59.9  
DP2 disconnected (normal left inverted right x axis y axis)
VIRTUAL1 disconnected (normal left inverted right x axis y axis)

The asterisk (*) represents the current mode, while the minus (-) represents the default mode. I would assume the first mode listed is the default since the above order matches what the EDID information from the display.

After trying many different options I ended up using the video command line parameter to request a specific output and video mode:

[htpc][ 2:41PM]~%> grep ^GRUB_CMDLINE_LINUX_DEFAULT /etc/default/grub
GRUB_CMDLINE_LINUX_DEFAULT="video=HDMI-A-2:1920x1080@60"

The available resolutions can be found in the xrandr output above. The name of the device was a bit more complicated to find. Looking in /sys/class/drm and finding an entry that was enabled is probably the easiest way to determine this:

[htpc][ 6:06PM]~%> for i in /sys/class/drm/card*/enabled; do echo -n "$i\t"; cat $i;done
/sys/class/drm/card0-DP-1/enabled    disabled
/sys/class/drm/card0-DP-2/enabled    disabled
/sys/class/drm/card0-HDMI-A-1/enabled    disabled
/sys/class/drm/card0-HDMI-A-2/enabled    enabled
/sys/class/drm/card0-VGA-1/enabled    disabled

With this change made the system boots with 1080p as the default resolution instead of 720p. Other options may have worked, but I was also fighting to get HDMI sound output at the same time! There option I played with was using the kernels built in EDID information via the ‘drm_kms_helper.edid_firmware=HDMI-A-2:edid/1920×1080.bin‘ command line option. While this worked it also seemed to stop sound from working, although I am longer sure if that was due to the ‘no sound at 1080p‘ issue or because this built in EDID needed to contain sound information for sound to work. Since the video options is working perfectly now I have left it as it is.

But even though this change resulted in it starting up the correct resolution it still failed to hold that resolution when switching devices. Changing away from the HTPC and back again more often than not resulted in it returning to 720p. Each time this happened the following kernel messgae was logged by the kernel:

[527883.367864] [drm:drm_edid_block_valid] *ERROR* EDID checksum is invalid, remainder is 161

This appears to be an issue with the kernel and its re-reading of the EDID information when the display is re-connected. After upgrading to the latest kernel (3.13-rc3) and xorg (via the xorg-edgers-ppa-precise) this issue has now gone away. It looks like this is a kernel issue so I would assume the kernel upgrade was responsible for fixing this.

Pioneer SC-LX57 (SC-75) I/O assignments

The following image shows the inputs available on the rear of the Pioneer SC-LX57:

Pioneer SC-LX57 rear panel inputs

There are eight HDMI inputs (IN1, BD, IN2, IN3, IN4, IN6, IN7 and IN8) on the back panel with an additional HDMI input on the front (IN5/MHL). There are two component inputs, two coaxial digital inputs, two optical digital inputs and a number of analog and composite video inputs. Other inputs include the adapter port for an optional bluetooth adapter, an Ethernet port and a WiFi adapter (usb) port (not shown) for network access and a USB port on the front.

The available options for input assignment to devices wasn’t totally clear from the manual. After some experimentation I now have a full table of what inputs can be used with each device, as shown in the following table:

Input assignments
INPUT
DEVICE
OPT
1
OPT
2
COAX
1
COAX
2
HDMI/
BD
HDMI/
IN1
HDMI/
IN2
HDMI/
IN3
HDMI/
IN4
HDMI
/MHL/
IN5
HDMI/
IN6
HDMI/
IN7
HDMI/
IN8
Comp-
onent

1
Comp-
onent

2
Analog
1
Fixed
Analog
Fixed
Comp-
osite
Direct
Remote
Key
TV Y Y Y Y                       Y     TV
CD Y Y Y Y                       Y     CD
BD         Y                           BD
DVD Y Y Y Y   Y Y Y Y Y Y Y Y Y Y   DVD DVD DVD
SAT/CBL Y Y Y Y   Y Y Y Y Y Y Y Y Y Y   SAT SAT SAT/CBL
BDR/DVR Y Y Y Y   Y Y Y Y Y Y Y Y Y Y   BDR BDR BDR/DVR
VIDEO Y Y Y Y   Y Y Y Y Y Y Y Y Y Y   VIDEO VIDEO  
HDMI5           Y Y Y Y Y Y Y Y           MHL
HDMI6           Y Y Y Y Y Y Y Y            
HDMI7           Y Y Y Y Y Y Y Y            
HDMI8           Y Y Y Y Y Y Y Y            

Some additional notes an the input assignments:

  • Audio assignment for the TV device is not available when HDMI ARC (‘Audio Return’) is enabled. When ARC is enabled the audio is taken from the return audio path via the HDMI OUT 1 output.
  • The Analog and Composite fixed inputs are dedicated to the specified device and not assignable.
  • All devices have IR input codes to directly select the device.
  • All devices have separate  ‘Auto’ input IR codes that as well as selecting the device will also power on the AVR if it is not already powered on and then switch to the selected input. This is very handy in that it avoids a delay that would normally be needed to wait for the AVR to power up before selecting the correct input.
  • It is not possible to select video and audio devices separately (so no way to watch the SAT/CBL device while listening to the CD device for example.)
  • When an audio only device is selected the HDMI output appears to be turned off.
  • HDMI4, HDMI6, HDMI7 and HDMI8 are connected via an internal HDMI switch. This does not effect assignment or input selection but it does effect the HD-ZONE output (If using the third HDMI output as a separate zone.) It is not possible to have more than one source from this group active at any time.
  • The inputs without a direct access key on the remote can still be selected by using the HDMI input cycle button or the next/previous device button.
  • The MHL remote button does not have any device code associated with it. It switches the remote to the Pioneer MHL control IR code set.
  • The HDMI remote button does have a device code associated with it, but it will also cycle through any HDMI input that are not skipped each time it is pressed.

In many ways this is far more complex to setup and far more restrictive than the Yamaha RXV-3800 that it replaced. All the extra inputs and the full list of IR codes made available by Pioneer though have made this far less of a problem  then it might have otherwise been.

Note that the Pioneer SC-LX57 is also known as the SC-75 in other markets. The SC-LX77 and SC-LX87 (SC-77 and SC-79 in other markets) are practically identical from the input device configuration point of view (with the addition of a PHONO and USB DAC inputs being the main differences).

Leopold FC700R Keyboard

Everyone is going crazy over mechanical keyboards these days and if everyone else thinks it is a good thing then surely it must be? As someone who spends a good part of everyday using the keyboard and mouse I consider these tools of my trade and having a keyboard you can use day in and day out is important. So with my existing keyboards (I make sure I have the same at home and at work) showing their age it was time to look for something new.

Most people probably find the choice of mechanical switch type the most difficult thing to settle on, and I was certainly no different in that regards. Moving on from the Logitech DiNovo for Notebooks keyboard which have a very light press and short travel it looked like the Cherry MX Red switches would be the closest match, and probably more suited to what I liked in a keyboard. In the end it was either the Reds or the Browns and decided to go with the Reds, being the closest to what I am used to.

The next consideration was the size of the keyboard. As someone who has practically never used the number keypad area of the keyboard it seems like a waste of space having it there. So a TKL (Ten Key Less) keyboard which does away with the number keypad area seemed like it would be well worth trying, if I could find a suitable keyboard in TKL form. Availability of TKL keyboards seems quite limited so I wasn’t sure this would end up being possible.

Next up was the type of keycap type. Anyone reading up on these will already know that most keycaps are made from ABS which tend to get shinny after a lot of use, while PBS is apparently rougher feeling but will last longer (although how many keycaps have you actually ever worn out?) and won’t develop a shinny surface as quick. Looking at how shinny the keys on my existing keyboards are it seemed like PBS keycaps would also be worth trying out.

And lastly there are different methods available for putting the writing on the keycaps. Considering how quickly I wear the writing off I really liked the idea of dye sublimation, where the dye is sunk into the keycaps, so the writing will practically  never wear off. Anything that last longer would be good though, but at the end of the day I don’t look at the keyboard much so if anything was going to be left out this would be it.

Unfortunately the number of  TKL keyboards available is pretty limited and while PBT is a showing up in a number of keyboards the use of dye  sublimation keycaps are almost non-existent. In the end it came down to a choice between the Ducky DK9008G2 Pro PBT, which had PBT keycaps and dye sublimation but wasn’t TKL, and the Leopold FC700R, which had PBT and TKL but didn’t have the dye sublimation. In the end TKL won out and the Leopold with Cherry MX Red switches was ordered:

leopold-FC700R-top

I must say that initially the noise of the keys (as they bottomed out) was very off putting. But now I tend not to bottom the keys so hard and am far more used to the sound of the keys. Unfortunately I think you really need a week or two to get the feel for the keyboard so one day I might be forced to buy a keyboard with Cherry MX Brown switches to see how they compare. At this stage I would say I am happy with the Red’s though and this keyboard definitely feels better now than my old Logitech DiNovo for Notebooks keyboard.

It feels very heavy. Checking the scales it weighs in at 953g, which is surprisingly not that much heavier than the Logitech DiNovo for Notebooks which weighs in at 890g. It is smaller so maybe thats why it feels like it is so much heavier.

TKL is a fantastic idea. I have not missed the keypad one bit while loving the extra space afforded by not having it. I can’t see my getting a full size keyboard ever again as long as their are decent TKL versions available. As well as bringing the mouse in closed This has allow my Wacom tablet, which sites to the right of the mouse, to be a few inches close which makes it a lot more comfortable to use.

Going back to a wired keyboard from a wireless one has not really been an issue. I think for a mouse it would be very annoying but the keyboard its fine. Even on the few occasions where  I need to push the keyboard out of the way it hasn’t been an issue. The cable can be routed to the left, center or right. Initially I had it going to the right be ended up moving it to the center.

The only let down on the Leopard is the writing on the keys. The letters appear to be just stuck on and after only a couple of weeks the writing on the left Ctrl, left Alt and A keys is half warn off. I still think TKL was worth it over keys that keep their writing, but it would have been nice to have both.

I can happily recommend TKL keyboards to anyone thinking about them. The Cherry MX Red switches I am pretty happy with, but they are very light to press and have no feedback at the point of actuation. In many ways this is similar to the DiNovo Keyboard for Notebooks although the key travel is a lot further. The Leopard FC700R is an excellent keyboard, but now that PC Case Gear have stopped carry stock it looks like it may be difficult to obtain in Australia now. If Ducky ever release a TKL version of the DK9008G2 Pro PBT I will be be forced to try that out, otherwise I think my FC700R will suffice for a long time. Highly recommended.

ASRock motherboard COM header

I recently found the need to have a serial cable connected to my server, but like most systems these days there was no serial port to be seen on the back panel. The motherboard in the server is an ASRock Z77 Extreme4 which includes a COM port header on the motherboard. Looking around the office at other motherboards the only other motherboard with a COM port header is the ASRock Z77 Pro4 M. There is also an ASUS P8P67 Pro and a Gigabyte GA Z68M D2H being used, neither of which contain a COM Port header.  So this appears to be a common feature of the ASRock motherboards.

So with the COM header on board the search was on to find or make a cable up to be able to make use of this header. The pin layout for the header is included in the manuals so making a cable would have been relatively easy, but making up someone to connect it to the back panel might have requires some creative work. Buying a pre-made one was always going to be easier, so that was the preferred option.

A quick search of ebay found a several candidates and at a price that it was worth trying them out to see if they worked. I finally settled on ordering cables described as a Serial 9 pin DB9 RS232 Motherboard Com Port Ribbon Cable Connector Bracket for AUD $1.35 each from a China supplier. After a 9 day wait the cables arrived and were ready to installed:

Db9 RS-232 Motherboard CableSerial 9 Pin DB9 RS-232 COM Port bracket and Motherboard Ribbon Cable

Both the motherboard end of the cable and the motherboard header itself were both keyed so that the cable could only be installed one way around:

RS232 DB9 Motherboard End

The cables were tested on both of the ASRock motherboards and worked fine in both cases. The ribbon cable is 270mm long which provides plenty of room to reach the back panel from the header.

Monitoring of the UPS status on the server has been happily working via the serial connection to the UPS for several days now.

So if you have an ASRock motherboard with a COM port header and need a serial port these low cost adapters look like they work fine.